iPhone 6
Please follow the instructions below to perform the changes.
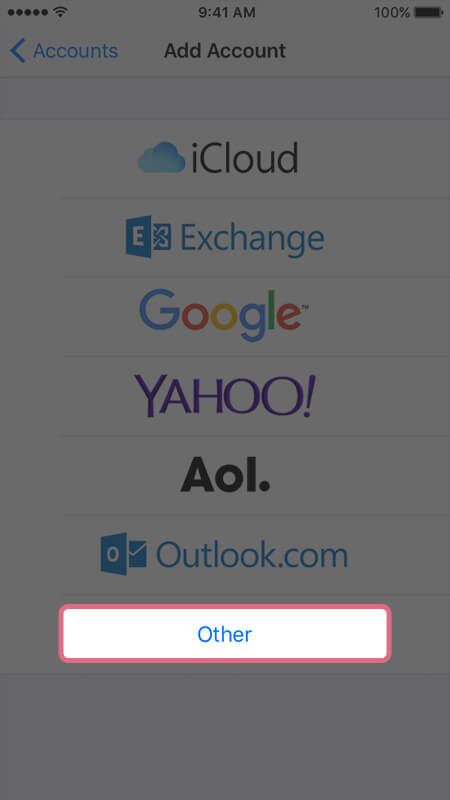
First step:
- From the Home screen, choose Settings
- Next tap Mail, Contacts, Calendars
- In the Accounts section, tap Add Account…
- Choose your email account type. For setting up email to work with web-solutions mail, choose Other.

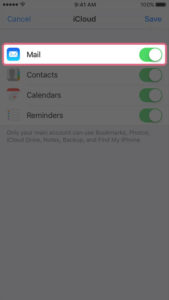
Second step:
- Choose the content you want to sync and tap save. Select Add Mail Account under the Mail section.
- Enter your name and email address. Then tap Next.
- Make sure to enter your information. The iPhone indicates these fields as optional but they are not.

- On the next screen, enter your account details. We strongly suggest using maiil.web-solutions.dk access domain, witch will work properly with SSL enabled – this is default setting on the iPhone.

- Incoming Mail server
Host: mail.web-solutions.dk
Name: enter your email address here
Password: enter your password – if you don’t remember it – visit our FAQ site
- Outgoing Mail Server (SMTP)
Host: mail.web-solutions.dk
Name: enter your email address here
Password: enter your password – if you don’t remember it – visit our FAQ site
Tap Save to save the entered information. Your iPhone will then verify your account information.
Back
Last updated: August 17, 2017 by Web Solutions